If you want to maximize your on-field stamina and survivability in Where Winds Meet, you need to hit the film room and study the Divinecraft Dungeons. Unlike standard Outposts or World Bosses, these single-player instances strip away the combat and strictly test your puzzle-solving mechanics and field vision.
Your ultimate goal here? Securing Medicinal Tales to expand your medicine carrying capacity.
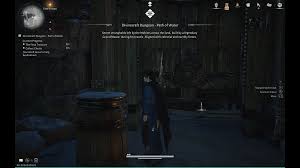
The Path of Water is a complex, three-stage puzzle instance located in the Kaifeng region. If you are struggling with the golden dragon consoles or missing hidden chests, here is the complete, inverted-pyramid tactical breakdown to clear the dungeon and sweep all the loot.
The Core Strategy: Path of Water Walkthrough
The Path of Water is divided into three distinct zones. You will need quick reflexes, precise archery, and a solid understanding of the dungeon’s water-level mechanics to advance.
First Quarter: The Speed Drill
The opening zone is a straightforward, timed execution drill.
-
Snap the Ball: Pull the central lever to start the clock. A door will open, revealing a large bell.
-
Quick Strike: Instantly fire an arrow to ring the bell.
-
The Finish: Sprint to the stone door beside the bell and hit the glowing circle with your Meridian Touch before the timer expires.
Second Quarter: Mastering the Golden Dragon
This area introduces the Control Console, which dictates the water flow for the rest of the instance.
-
Shift Right: Interact with the console (located next to the lever) and slide the golden dragon mechanism all the way to the right side of the formation.
-
Flood the Zone: Pull the lever to fill the arena with water.
-
Shift Left: Return to the console and move the golden dragon one slot to the left.
-
The Swim Route: Dive in, swim to the left-side platform, and shoot the bell with your bow.
-
The Hurry-Up Offense: Immediately swim back, pull the lever, drop down to the lower level, and use Meridian Touch on the newly revealed stone door’s glowing seal.
-
Advance: Head through the door, dive deep, swim to the opposite side, and climb the ladder to reach the final zone.
Third Quarter: The Dual-Zone Execution
The final puzzle requires you to run plays across both the second and third zones simultaneously.
-
Clear the Blockers: Equip a fire arrow and shoot the dry vines jamming the wheel mechanism in Area 3. You’ll need to find a clean throwing lane to make the shot.
-
Backtrack: Jump across the gap using the vines to return to the Control Console in Area 2.
-
Set the Board: Move the golden dragon all the way left. Pull the lever, then shoot the Area 2 bell again.
-
The Drop: Jump back down into Area 3 and use Meridian Touch on the glowing circle located beneath the platform to unlock the pathway.
-
The Final Flood: Head back through the door to Area 2. Shift the golden dragon all the way right and pull the lever one last time to flood the zone.
-
Touchdown: Swim down through the connecting door between the zones to reach the end zone of Area 3 and claim the final chest.
Social Media Link Suggestion: [Twitter Placeholder: Stuck on a Divinecraft Dungeon? Tag your co-op partner and share this playbook!]
ALSO READ: The Heartopia Playbook: Executing the Double Black Truffle Exploit
Film Room: All 6 Hidden Chest Locations
Don’t leave the field without sweeping the area for hidden yardage. Here is exactly where to find all six chests inside the instance.
-
Chest 1: Before you transition into Area 2, look for an opening to the left of the main door. Route through it to find your first pickup.
-
Chest 2: Found sitting right next to the primary lever in Area 2.
-
Chest 3: Once you flood Area 2 for the first time, swim all the way to the opposite end of the chamber to grab this chest.
-
Chest 4: After successfully unlocking the stone door in Area 2, dive down into the water immediately to find this hidden stash.
-
Chest 5: Upon climbing the ladder into Area 3, immediately pivot to your right and drop down onto the adjacent platform.
-
Chest 6: The championship trophy. Located in the small back room at the absolute end of the dungeon, only accessible after solving the final Area 3 water puzzle.
Facility Coordinates and Payouts
The Location: You are scouting the west side of Kaifeng. Fast travel to the Petalfall Crossing boundary stone and push northeast. The entrance to the dungeon is heavily concealed behind a running waterfall.
The Post-Game Payout (First Clear Rewards): Successfully executing this game plan nets you franchise-building materials:
-
Frostbane Crown (x1)
-
Medicinal Tales (x2) (Crucial for expanding your medicine cap)
-
Echo Jade (x25)
-
Kaifeng Exploration Points (x25)
-
10,800 EXP & 10,800 Coins